

While working with AngularJS one often requires some guidelines and filters, which greatly simplify the development process and add responsiveness to interface. Many of them are quite trivial and demand access to search engines. Most of them can be found by a quick search, but I put together in one place a few tools that we commonly use in our projects.
Email address validation
validateEmail: function (email) {
   var rx = /^+@[a-zA-Z0-9](?:[a-zA-Z0-9-]{0,61}[a-zA-Z0-9])?(?:\.[a-zA-Z0-9](?:[a-zA-Z0-9-]{0,61}[a-zA-Z0-9])?)*$/;
   return rx.test(email);
}
To verify the email address we use a simple regular expression. Note that it is only used to verify that a user has not entered obvious nonsense. If you follow the RFC standard, it is possible to encounter some difficulties. This is due to various factors: the constant updating of the domain zones list, the use of Internationalized Domains (IDN), the use of sensitive addresses and many others. So, our validation checks only the general structure of addresses (the presence of ‘@’ and dot), otherwise it relies on the adequacy of a user. If you really want to validate an email addresses, it is better to use a confirmation by e-mail than to come up with bulky regular expressions.
Finding an element in the array by value
getByProperty: function (array, val, type) {
    var length = array.length;
    for (var i = 0; i < length; i++) {
        if (array[i][type] === val) {
            return a[i];
        }
    }
    return null;
}
The task of searching in an array by a value-specified field occurs quite often. For example, it can be used to find an element with a certain ID. The simplest function getByProperty eliminates the frequent use of cycles in a code.
Example of use:
user = getByProperty(usersArray, 1, 'id');
Generating a unique identifier
While developing single-page applications (SPA, single page applications), it is sometimes required to create unique identifiers directly on the client side (front-end). For these identifiers to work properly with a server (back-end), you should create them in the usual UUID format . Here is a small feature that has never let down:
generateUUID: function () {
 var s = [];
 var hexDigits = "0123456789abcdef";
 for (var i = 0; i < 36; i++) {
     s[i] = hexDigits.substr(Math.floor(Math.random() * 0x10), 1);
 }

 s[14] = "4";
 s[19] = hexDigits.substr((s[19] & 0x3) | 0x8, 1);
 s[8] = s[13] = s[18] = s[23] = "-";
 return s.join("");
}
Processing pressing Enter at input
To improve the experience of your product, it is worth thinking about even minor details. For example, you should allow a user to still operate with his usual hot keys. After filling some data in the text field I want to confirm the action by pressing Enter, instead of taking your hands off the keyboard and drag the cursor to the button.
app.directive('ngEnter', [function () {
    return function (scope, element, attrs) {
        element.bind('keydown keypress', function (event) {
            if (event.which === 13) {
                scope.$apply(function (){
                    scope.$eval(attrs.ngEnter);
                });
                event.preventDefault();
            }
        });
    };
}]);
Here’s how to use this directive:
<input type="text" ng-enter="action()"/>

<button ng-click="action()">Action!</button>
Representing bytes in a human-friendly format
Since BitCalm commonly uses file sizes measurement, we needed a tool to convert units in a convenient format on the fly. For this purpose the following filter for Angular was written
app.filter('bytes', function() {
    return function(bytes) {
        if (isNaN(parseFloat(bytes)) || !isFinite(bytes) || bytes == 0) return '0';
        var units = {1: 'KB', 2: 'MB', 3: 'GB', 4: 'TB'},
            measure, floor, precision;

        if (bytes > 1099511627775) {
            measure = 4;
        } else if (bytes > 1048575999 && bytes <= 1099511627775) {
            measure = 3;
        } else if (bytes > 1024000 && bytes <= 1048575999) {
            measure = 2;
        } else if (bytes <= 1024000) {
            measure = 1;
        }

        floor = Math.floor(bytes / Math.pow(1024, measure)).toString().length;

        if (floor > 3) {
            precision = 0
        } else {
            precision = 3 - floor;
        }
        return (bytes / Math.pow(1024, measure)).toFixed(precision) + units[measure];
    }
});
Here’s how it works:
<span>{{ 234242345 | bytes }}</span> <!-- '223MB' -->

<span>{{ 56734654 | bytes }}</span>  <!-- '54.1MB' -->

<span>{{ 1024 | bytes }}</span>      <!-- '1.00KB' -->
Creating a nested scrolling
The situation where on the page with a scroll bar there is sub-element, which you can also scroll through, causes great inconvenience.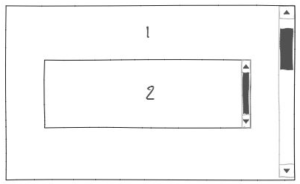
When the cursor is over an area 2, both scroll bars will be scrolled which makes it impossible to comfortably view the content in this area. To solve this problem, we use a simple directive:
app.directive('nestedScroll', [function () {
    return function (scope, element) {
        element.on('mousewheel DOMMouseScroll', function (e) {
            var e0 = e.originalEvent || e,
                delta = e0.wheelDelta || -e0.detail;
            this.scrollTop += ( delta < 0 ? 1 : -1 ) * 30;
            e.preventDefault();
        });
    }
}]);
When you hover over the necessary item the standard action gets blocked and a simple operation is applied with the scrollTop feature.
Playing sound upon certain events
If your application requires producing sound upon specific events, it can be done with the help of the following directives:
app.directive('soundNotification', [function () {
    return function (scope, element, attrs) {
        scope.$on('playSound', function () {
            element.attr('src', '');
            element.attr('src', attrs.msrc);
            element[0].play();
        });
    }
}]);
Now, of all the places of an application you can send ‘playSound’ events using $emit and $broadcast. The element must have the attribute ‘msrc’ with the path to a file. Otherwise, the path can be sent to an event as an argument.
Determining of the tab browser activity
There are times for you to perform some action when the user switched from the tab with your application (the examples of actions are switching on audio alerts, enable browser-based notification, etc.). For this one may use the following function:
detectTabActivity: function (focusInCallback, focusOutCallback) {
    var notIE = (document.documentMode === undefined);
    if (notIE && !window.chrome) {
        $(window).on("focusin", focusInCallback).on("focusout", focusOutCallback);
    } else {
        if (window.addEventListener) {
            window.addEventListener("focus", focusInCallback, false);
            window.addEventListener("blur", focusOutCallback, false);
        } else {
            window.attachEvent("focus", focusInCallback);
            window.attachEvent("blur", focusOutCallback);
        }
    }
});
Two callback-functions, which come for an input, can perform any action upon the ‘focus’ or ‘blur’ events.
I hope this method will be as useful for your AngularJS work

Arif Khoja is a Developer. He is a Javascript Enthusiatic who loves logical programming and has first hand experience in building a cutting edge internet product using Angular. He is also an open source freak and keen about learning and sharing. He writes Javascript both frontend and backend. He loves learning and sharing tech all the time. He also has a hands on experience in SEO and writes articles about latest emerging technologies.